
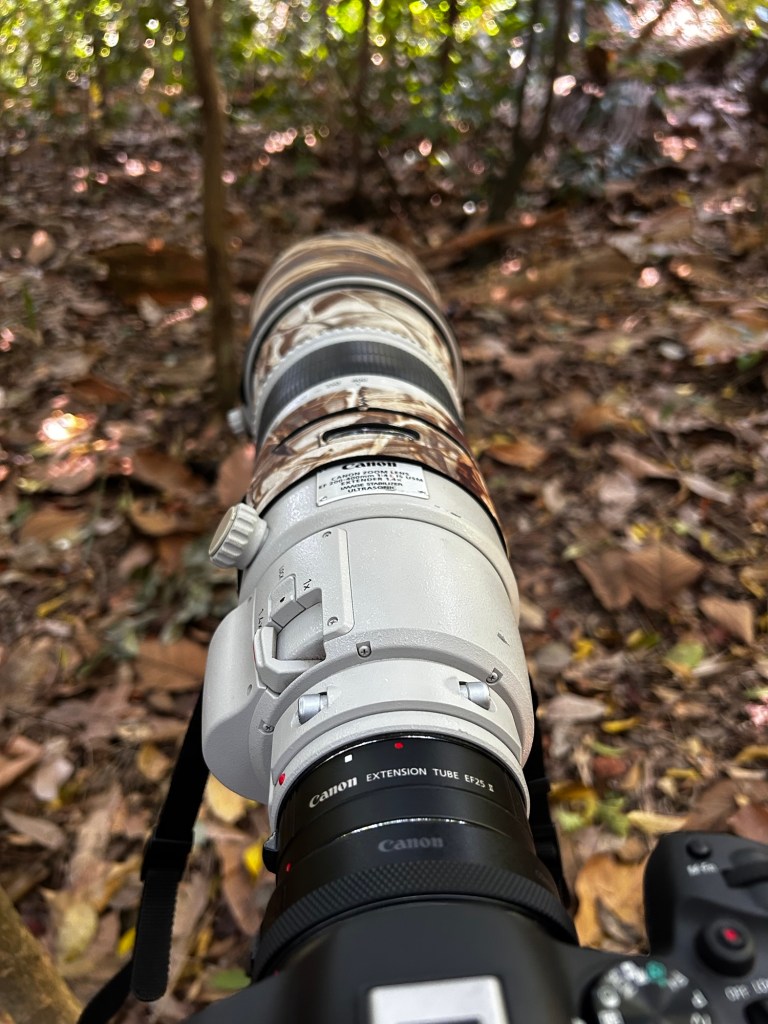
How to Use a 25mm Extension Tube on a 200–400mm f/4 Lens or 600mm f/4 lens to Photograph Pittas (Sharp Subject, Creamy Background)
Photographing pittas in the wild is one of the most rewarding—and challenging—experiences for any bird photographer. These ground-dwelling jewels are notoriously shy, often staying deep in shaded understory, and they rarely allow close approach.
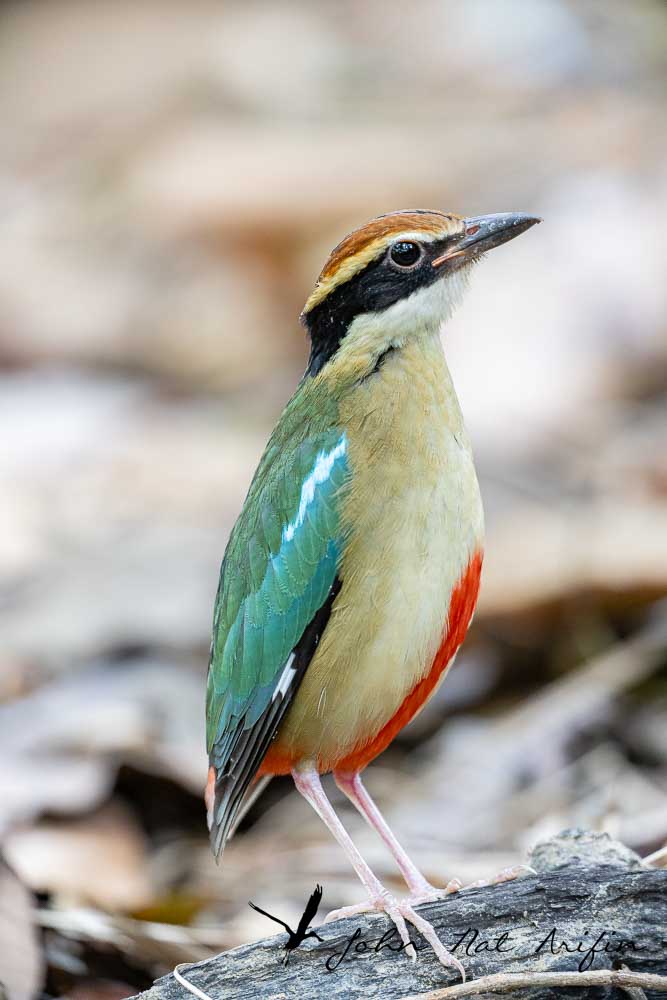
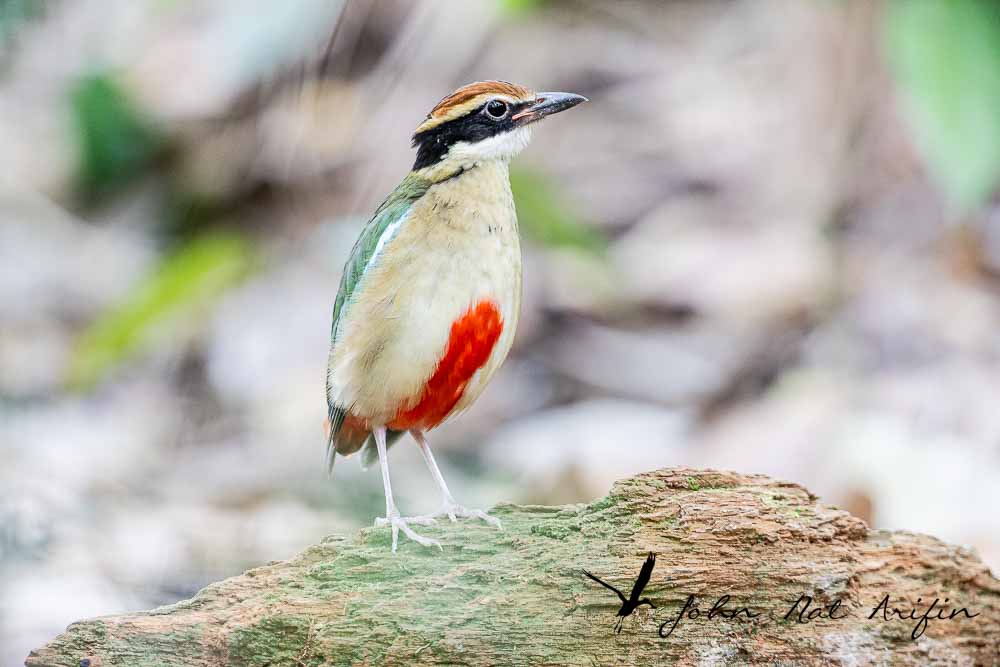
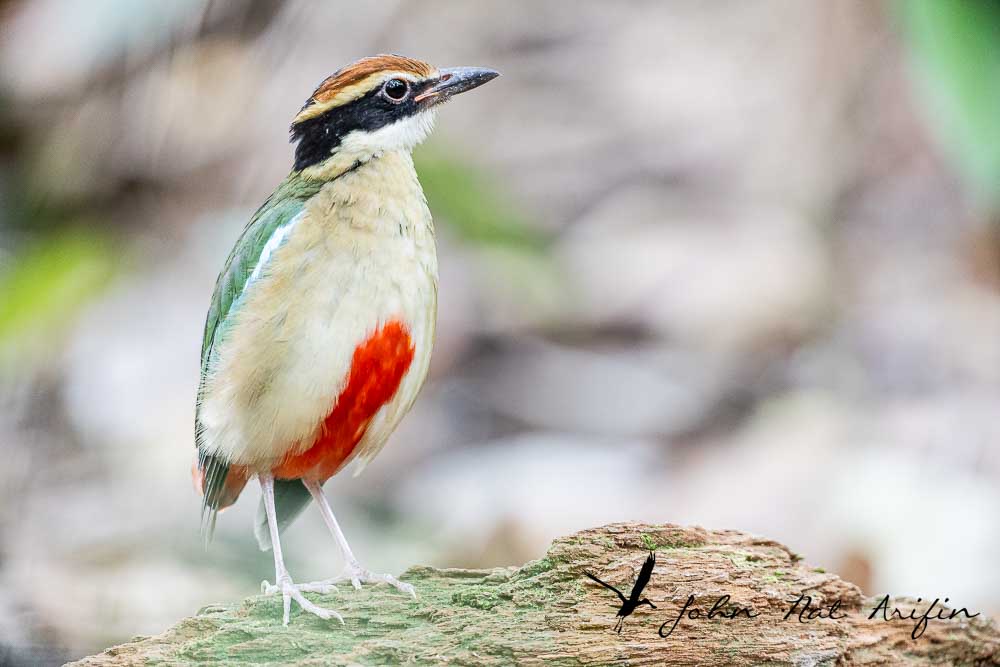
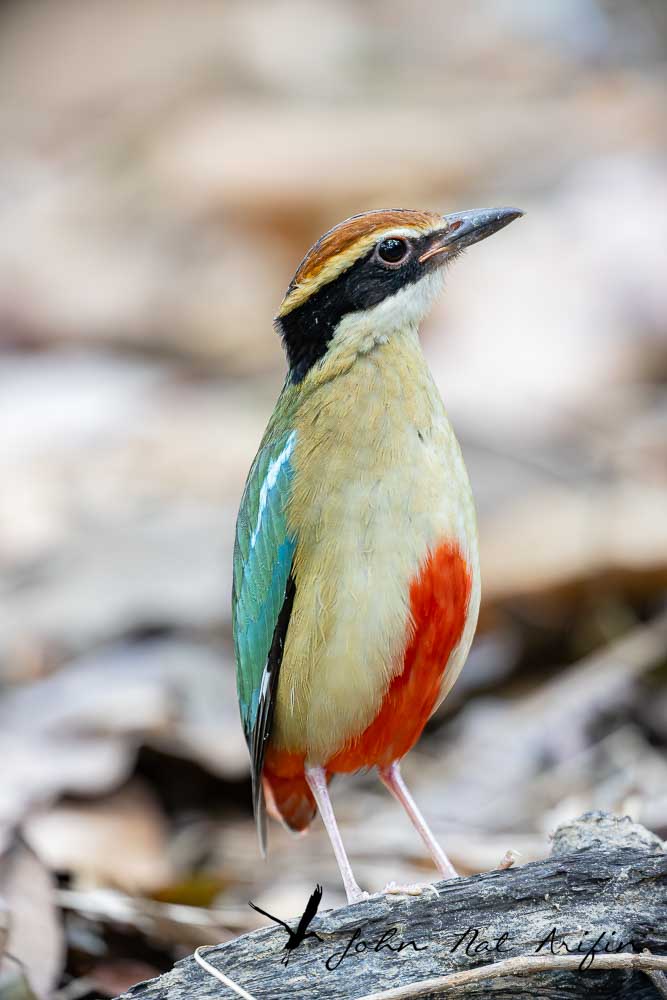
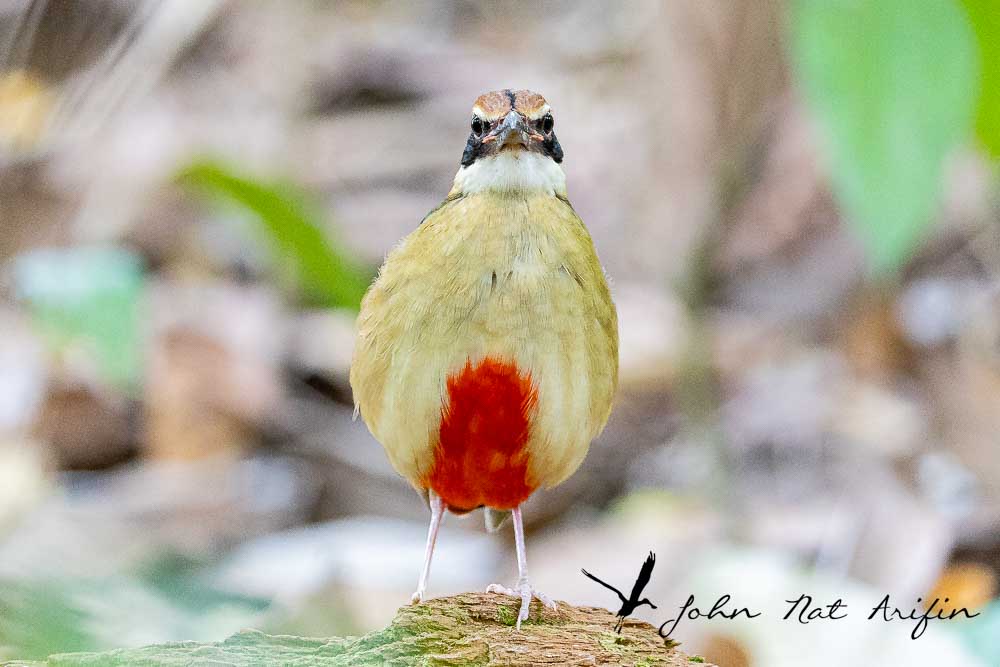
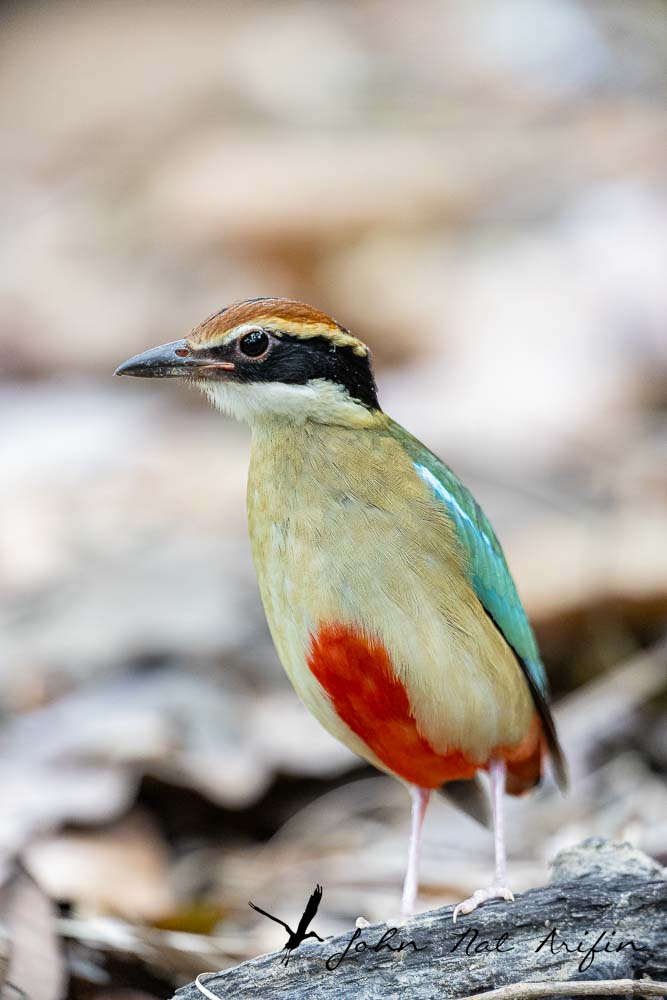
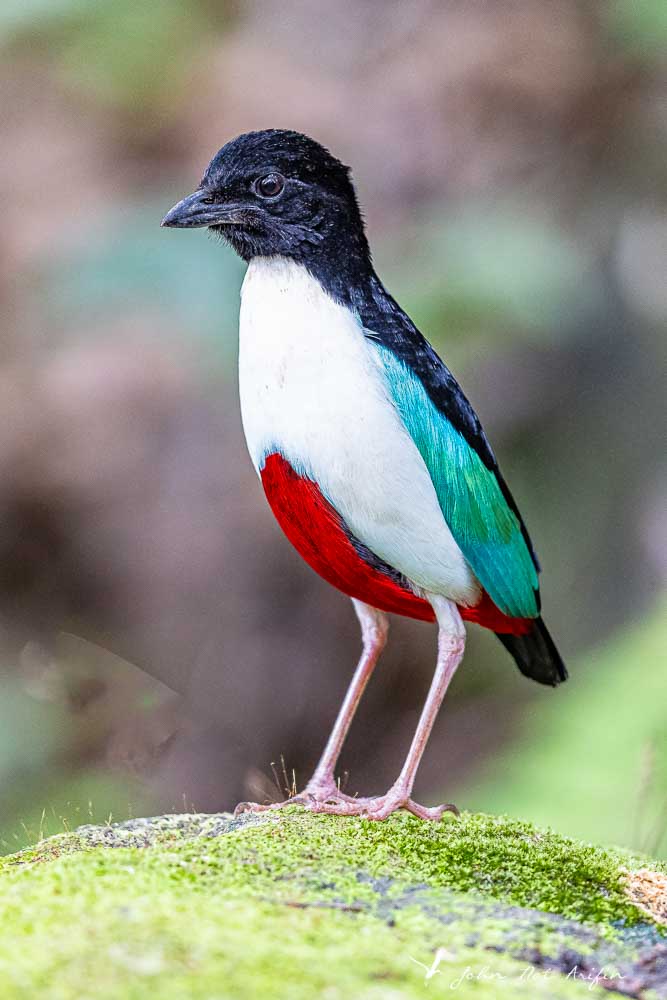
Over the years, I’ve photographed four species in Singapore: Fairy Pitta, Blue-winged Pitta, Hooded Pitta, and Mangrove Pitta. One technique that significantly improved my results—especially at close range—is using a 25mm extension tube on a telephoto zoom lens (200–400mm f/4) or 600mm f/4.
I’ll share how to use this setup effectively to capture tack-sharp pittas with beautifully blurred backgrounds, even at distances as close as 1 to 3 meters.
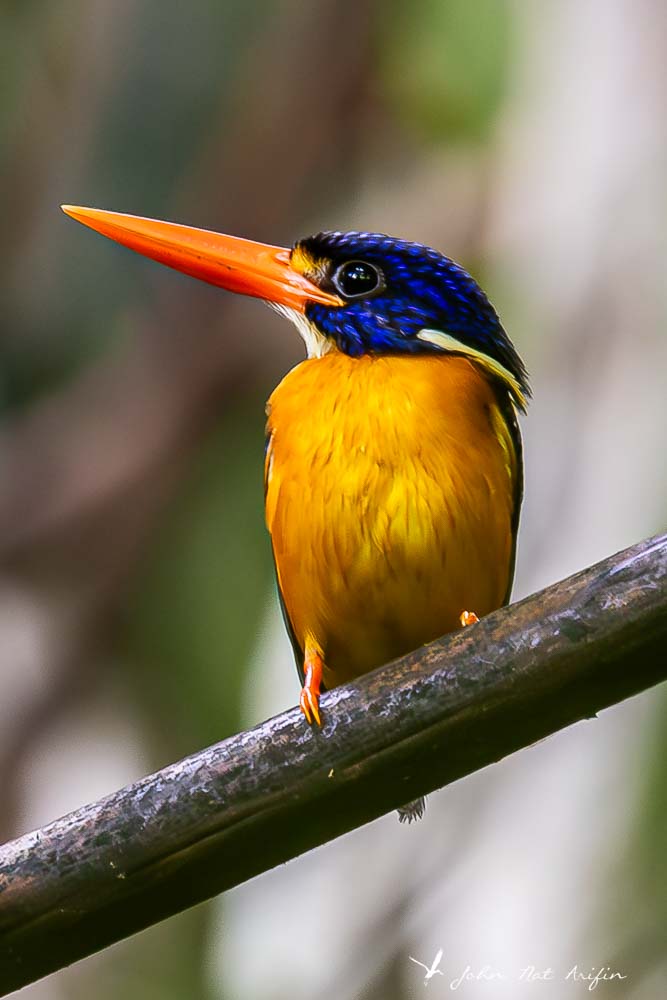
Zoom at 300 mm
Zoom at 400 mm
⸻
Why Use an Extension Tube for Bird Photography?
An extension tube is a simple accessory placed between your camera body and lens. It reduces the minimum focusing distance, allowing you to focus much closer than your lens normally permits. It is normally used for macro photography for higher magnification.
Key Benefits:
• Achieve closer focus (1–3m) with long telephoto lenses
• Increase subject magnification without losing image quality
• Enhance background blur (bokeh) due to closer focusing distance
• Ideal for small birds like pittas in tight forest environments
Unlike teleconverters, extension tubes contain no glass—so there’s no loss of sharpness.
⸻
My Setup for Photographing Pittas
For this technique, I typically use:
• Lens: 200–400mm f/4 telephoto zoom
• Extension Tube: 25mm
• Aperture: f/4 (wide open for maximum subject isolation)
• Distance to Subject: 1–3 meters
• Support: Tripod or beanbag
This setup works especially well when photographing species like the Fairy Pitta, which feeds within a predictable range.
⸻
Understanding the 25mm Extension Tube Effect
When you attach a 25mm extension tube to a 200–400mm lens or 600mm.
• The minimum focusing distance decreases significantly
• You cannot focus to infinity anymore
• The usable focus range becomes very narrow and close
This is perfect for situations where you already know the bird will appear within a fixed distance—like along a forest trail or feeding spot.
⸻
How to Get Sharp Pittas with a Blurred Background
Achieving a sharp bird with a creamy background requires a combination of technique and positioning.
1. Shoot Wide Open (f/4)
Using f/4 allows:
• Maximum light in dim forest conditions
• Strong subject-background separation
• Smooth, creamy bokeh
2. Control Your Distance (Critical!)
With the extension tube:
• Optimal shooting range is 1 to 3 meters
• Too close → difficult to focus or cannot focus.
• Too far → subject goes out of focus range
⸻
3. Increase Subject-to-Background Distance
This is the secret to smooth backgrounds:
• Position yourself so the background is far behind the bird
• Avoid cluttered foliage directly behind your subject
Even in dense forest, a small change in angle can dramatically improve background blur.
⸻
4. Use Longer Focal Lengths (200–600mm)
Zooming in:
• Compresses the background
• Enhances blur
• Makes the bird stand out more
At 200-600mm + extension tube + f/4, you can achieve superb subject isolation, even in messy environments.
⸻
5. Focus Technique Matters
Autofocus can struggle at very close distances with extension tubes.
Tips:
• Use single-point AF
• Aim for the eye of the bird ( animal eye- focus)
• Pre-focus on a perch or feeding spot
⸻
Field Strategy for Photographing Pittas
Pittas are creatures of habit. To maximize your chances:
• Scout locations where they are regularly seen
• Observe feeding patterns.
• Set up quietly and wait at a fixed distance
• Use natural cover or a hide
For species like the Fairy Pitta, patience is key—it may take hours (or years!) to get the perfect shot.
⸻
Challenges of Using Extension Tubes in the Wild
While powerful, this setup has limitations:
1. Very Narrow Focus Range
You must anticipate where the bird will be.
2. Reduced Light Transmission
Slight loss of light may require:
• Higher ISO
• Slower shutter speeds (use stabilization/tripod)
⸻
When Should You Use This Technique?
This method works best when:
• The bird is predictable in movement
• Shooting distance is close and controlled
• You want maximum background blur
• You’re working in low, cluttered forest environments
It is less suitable for fast-moving birds or unpredictable flight shots.
⸻
Real-World Results: Why This Technique Works
Using a 25mm extension tube with a 200–400mm f/4 lens allows you to:
• Fill the frame with small birds like pittas
• Create professional-level background separation
• Maintain excellent sharpness on the subject
• Capture intimate, eye-level portraits
For me, this setup made a huge difference when photographing elusive species like the Fairy Pitta—it transformed difficult forest scenes into clean, striking images.
⸻
Final Thoughts
If you’re serious about bird photography—especially shy forest species like pittas—adding a 25mm extension tube to your telephoto setup is a game-changer.
It forces you to slow down, anticipate behavior, and refine your technique. But when everything comes together, the results are stunning: a razor-sharp bird against a beautifully blurred background, even in the most challenging environments.

Learn how to use a 25mm extension tube on a 200–400mm f/4 telephoto lens to photograph pittas in the wild with sharp detail and creamy blurred backgrounds at close range.
Photographing 4 Species of Pitta in Singapore: My Journey to Capture the Elusive Fairy Pitta
How to Use a 25mm Extension Tube on a 200–400mm f/4 Lens or 600mm f/4 lens to Photograph Pittas (Sharp Subject, Creamy Background)
I


Leave a comment